Thank you for visiting our shop today!
Cart 0

Wildflower Pottery

DIY DIY Projects

The day our snow is melted we are out looking through the grasses and rocks on the mountain for the first peeks of those colorful blooms.  This year I wanted to preserve the first of the blooms with these farmhouse pottery slabs.  So, I went for a walk in the field to find a few beautiful flowers.  
 

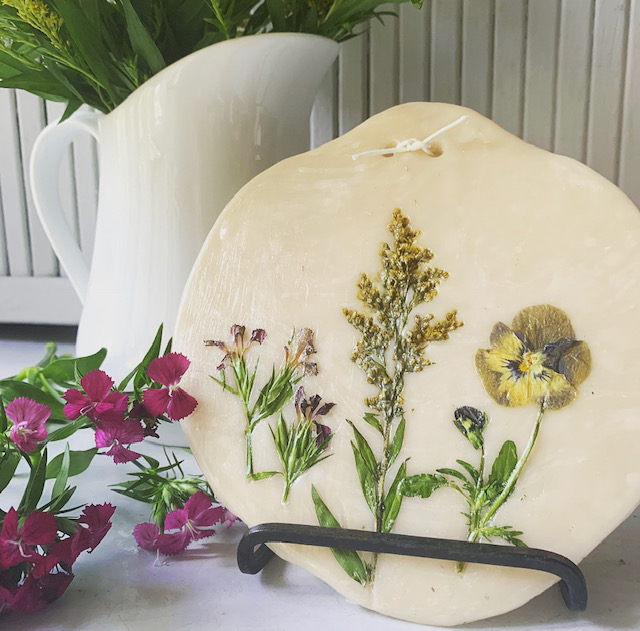
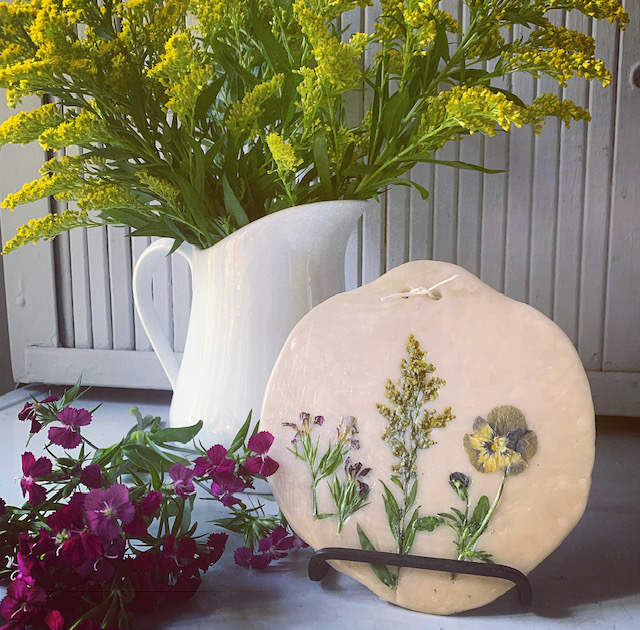
They are so easy to make and so beautiful hung in a collection on a wall, or displayed with your favorite blooms.  It is also a great way to preserve special blooms from bridal bouquets and other special occasions.  You can make them tiny for a single petal or bud and wear as a necklace or you can make a big slab and recreate your garden in pottery.  There are no limits to the ways this technique can be used to bring lasting wild flowers into your home.

 
The materials are few and relatively inexpensive.  You will want Polymer Clay.   I have tried using Air Dry Clay and it is so temperamental and brittle, it is sad to loose your blooms to weak clay, so I clearly recommend using the Polymer Clay.  I love to use Sculpey Polymer Clay .  It comes in lots of colors and is so smooth and easy to work with.  The directions were straight on correct and my projects always turn out perfectly using their clay.  So get some!  Price point is anywhere from $2.50 to $9.00 for a pack which will make 3 to 4 floral pottery 
pieces.
 
 
The Polymer Clay comes out hard like a brick.  You will want to break off a piece and knead it in your hands until it gets soft and workable.  Polymer Clay is made of plastic PVC material and softens as it is worked.  So kneads a piece and roll it out to be a 1/4 inch thick.  I like my edges to look like a slap of clay and not perfectly cut.  You can cut your shapes and edges with a knife, but again I love the natural look of rounded fingered shapes.  Use a toothpick or dowel to make a hole in the top to hang it from and place on a non-stick baking pan.
 

If you are wanting a relief of a flower, lay it down on the clay where you want it to mold and lightly roll over it with a rolling pin to make the indenture.  Lift the flower off of the clay and bake at 275 degrees for 15 minutes.  


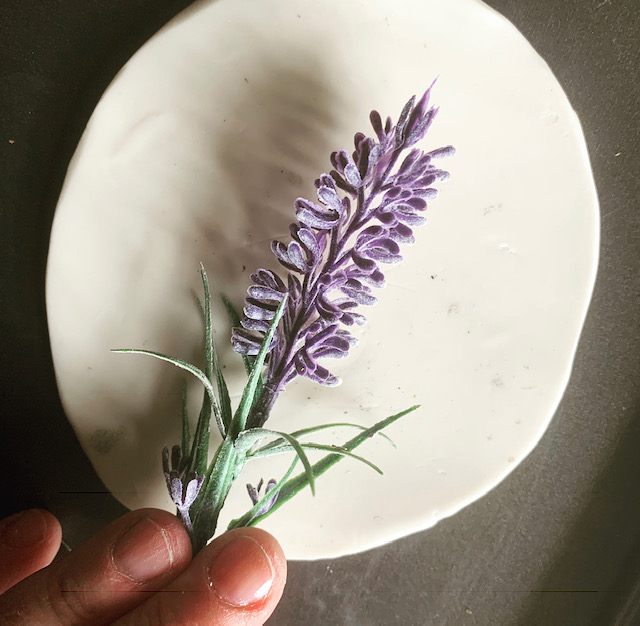
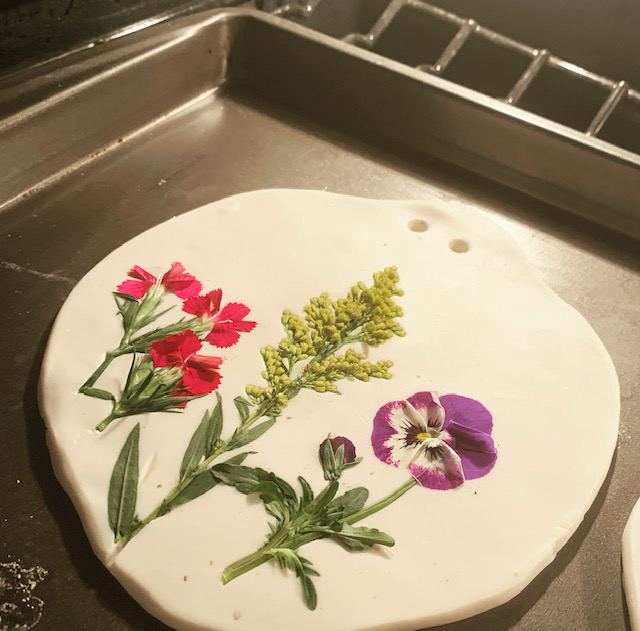
If you want to preserve fresh wildflowers with all their color, pick blooms that are soft and will flatten well.  Lay your blooms onto the clay in the place you want them to be and roll over to flatten them into the clay.   Use tweezers to position any petals that are out of place and tap lightly into the clay.  Pick off any that are standing upright and will not lay down.  Heat your oven to 275 degrees and bake for 20 minuets.

 
The baking process will dry out the flowers and the colors will dull just a bit, but the sealer will refresh them in the next process.  Let the clay cool.
 

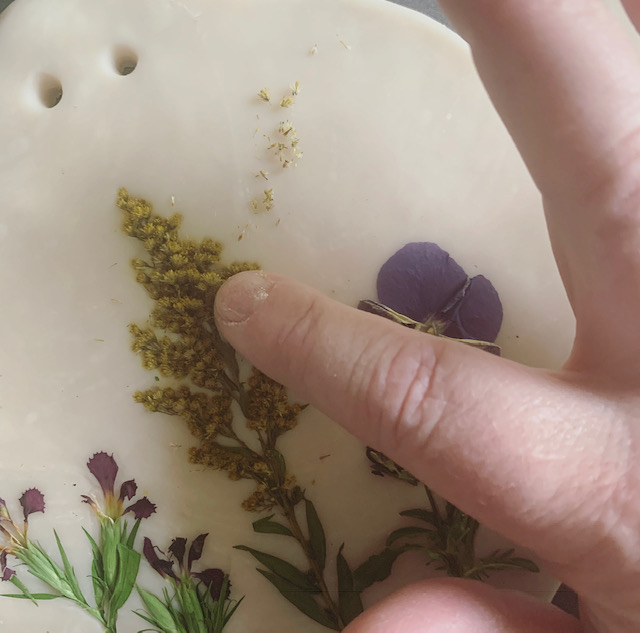
Use your finger to lightly brush off any loose petal crumbs or leaves that popped up during the baking/drying process.

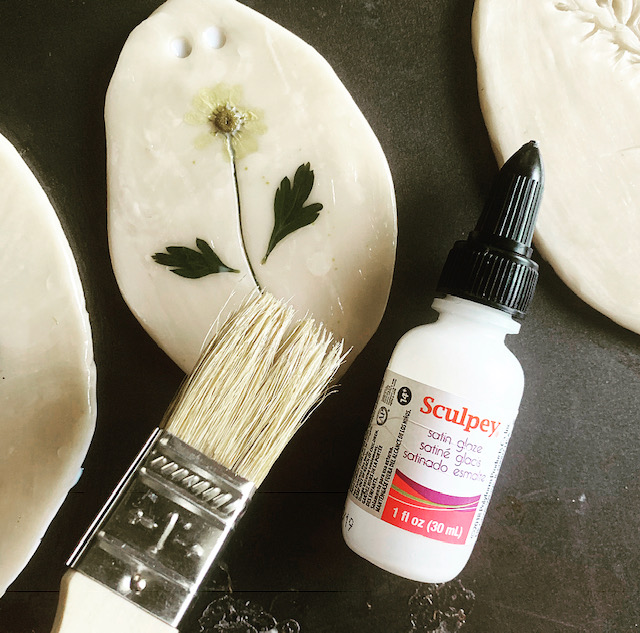
To seal your wildflowers, lightly brush over the baked flowers and clay background with the Sculpey Satin Glaze.  This liquid is the same component as the Polymer Clay but without the fillers, so just as the Polymer Clay dried hard, this satin glaze dries clear and hard over your clay piece to seal in the petals and other parts that may not have laid perfectly flat.  
After you have lightly brushed this over your clay piece, return it to the over for 5 to 10 minutes to bake it clear.  Watch closely as you can over bake it and turn your piece brown...(I know).    Bring it out of the oven and let cool.  
Use the tip of a needle or other tiny sharp object to clear the hole back out and your DIY Wild Flower Pottery piece is ready to hang! 

 
If you are looking for suppliers of the Sculpey products, I found mine at my local Hobby Lobby.  I hope you enjoy this DIY project!  It is one of my favorite of all time.  I know I say that often, but for real, this was so easy and relatively quick to make.  
 

Older Post Newer Post