Free Shipping on orders over $50 this week!
Cart 0

Boho Rag Flags

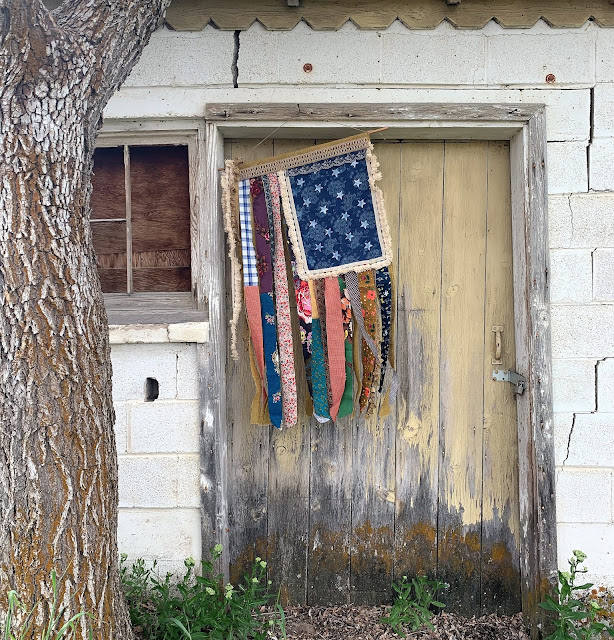
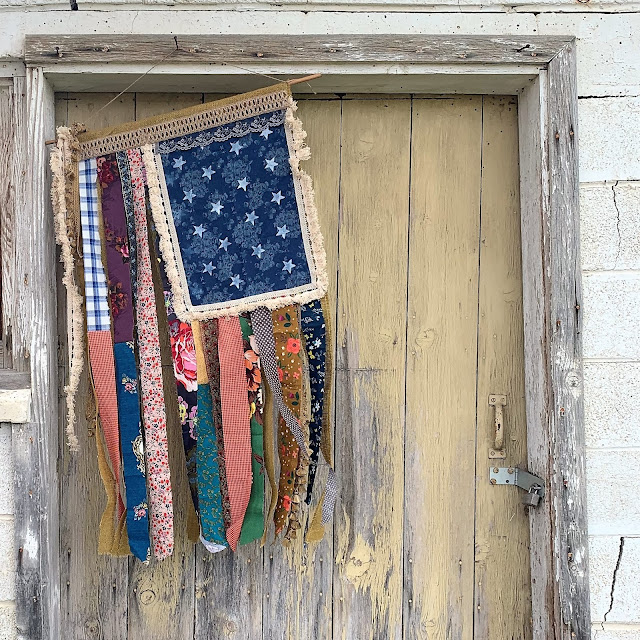
Happy Flag Day!  It's time for the red, white, & blue or Purple, gold, green & a whole lot of vintage yumminess!  You all know how much I love my florals and old lace, so when I was asked to create something for the summer holidays, I had to combine the two and create a Vintage Inspired DIY Flag.  
They are so colorful and rich with texture that I plan to keep mine up year round...well, maybe down at Christmas, but you get my passion.  These are simple to make because they are sew-free, meaning everything is glued.  To complete this project you will need.

Materials 
 
 Wood Dowel
Base Fabric (burlap or muslin)
Fabric Glue or Low-Temp Hot Glue
Scraps of Fabric, Lace, Trim, etc.
Twine
Sponge Stencil Brush
Star Stencil
Deco Art Vintage Wash Paint
Scissors
 
I am leaving the size of dowel and yardage of fabric/trims off of the material list because the amounts will vary depending on the size you are wanting to make.  To make the smaller Boho-Vintage Flag at the top of this post you will want a half yard of base fabric and fabric and trim that is a half yard or so in length.  To make the Red, White and Blue Vintage Flag I used one and a half yard of base fabric and fabric and trim that was a yard and a half long.
Instructions
 
1.  Cut your dowel to the desired width you want your flag to be plus four inches.  Stain it a desired color or you can paint it, or leave it plain.  All three options look great.
 
2.  Cut your background fabric into a long rectangle the width of your dowel minus four inches.  I hope that isn't too complicated.  You want to make sure your background fabric rectangle isn't larger than your dowel.  The smaller Boho Vintage Flag was 24" wide and 44" inches long.  
 
3.  Lay the background fabric on a flat surface and fold the top down two inches to create a sleeve for the dowel to go through.  Once you have folded it over, use the hot glue or fabric glue to secure the edge down.  Let dry.
 
4.  Turn the background fabric right side up with the sleeve to the back.  Cut a piece of smaller rectangle to create the Field of Stars.  To get the measurement, take half the width of your flag for the width of the "field" piece and the length would be figured at a third of the length of your background flag piece.  You are creating another long-ish rectangle for the stars.
 
5.  Using glue, attach the top of the Field of Stars piece to the top of the background fabric.  I positioned mine about an inch and a half below the top to allow space for extra trim and for the background fabric to show.  Because these are Vintage "Inspried" Flags and not a perfect correct replica of the American Flag, I positioned my Field of Stars on the right side of the background piece.  If you want to create a replica that matches the American Flag in perfect correctness, you will want to position your Field of Stars on the upper left side.  My flags hang at an angle to look like the flag is draped, and I was not concerned about the Field of Stars being on the left.  It is totally your choice which side you place them on.  Glue the outer edge down as well.  Leave the bottom and the left side unglued for now.
 
6.  After the Field of Star piece is attached on the outer and top side, it is time to add the layers of fabric and trims.  Cut a piece about two inches wide and as long as your background piece.  Using glue, attach it at the top just under the inner side of the Field of Star piece.  Then glue the strip to the background piece just to the end of the Field of Star piece.  You want your strips of fabric to wave free, so only attach this first piece to the corner of the Field of Stars.  Layer the Field of Star piece over the first strip and glue down in place.
 
7.  Cut another piece of fabric two inches wide and glue it only to the top of the flag aligned with the Field of Star piece and the first strip.  Repeat this all the way across.  I like to leave the edge of the background fabric showing about a half inch.  As you are layering fabric, you can overlap trims and fringe over pieces glued down to create a luscious layered look.  A few pieces of mine were purposefully pieced together using a tiny amount of glue to give it even more of a scrappy look.
8.  After you have gone across the top, position the smaller pieces under the bottom of the Field of Star piece and glue the Field of Star Piece down to the strips of fabric once you have the fabric strips glued down.  
 
9.  Now that your flag is filled in with strips of fabric, you can glue old lace trims around the Field of Stars to finish off the edge.  I love to layer trims and lace, so have fun choosing a look to finish it off.  Glue the pieces down and let dry.
 
10.  Once the trims dry, take a pair of scissors and cut the background piece up to the top and the the top of the Field of Stars piece going in between the strips of fabric.  This gives you a layered look to your flag.  Trust me, you are going to love it waving.  After I cut the strips I frayed the edges of the background pieces to give it a worn look.  I did this by running my fingers across the edge and pulling threads to create a frayed look.  It's easy!
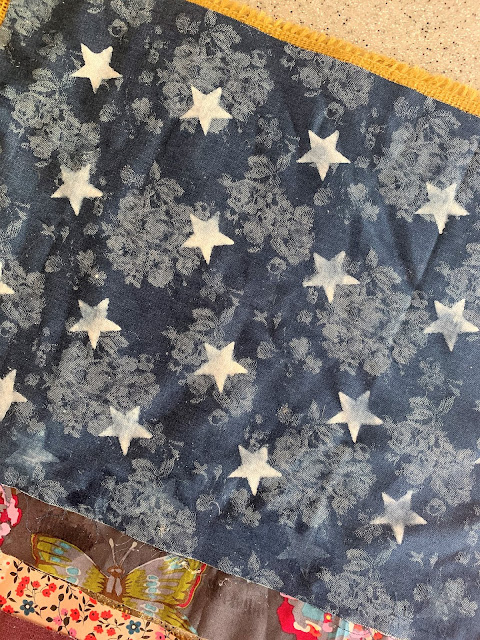
11.  To create the stars I used the Deco Art Vintage Effect Wash Paint, a sponge stencil brush and a star stencil.  I couldn't find a star stencil to match the size I wanted, so I took a wood cout out of a star I liked, traced it onto cardstock paper and trimmed the inside of the star shape with a knife to create the perfect star stencil.  I used a minimal amount of Vintage Effect Wash and lightly tapped the sponge stencil brush over the shape stencil to create a faded star look.  
 
I love the Vintage Effect Wash Paint from Deco Art!  It works as a paint, a stain, or a wash depending on how many layers you add.  For other ideas on how to use this amazing paint go to their site Deco Art!
 
12.  Let your paint dry and then all you have left to do is tie a string to both ends of the wood dowel to create a hanger.  Seriously,  wasn't that so easy?
If you love the traditional Red, White & Blue you can find a little inspiration below.  I used ribbon, lace strips, trims, burlap, and fabric to create this huge front porch flag.  Instead of gluing the pieces together I added a couple of "pieced" pieces to it by tying a knot in two different fabrics.  I love the shabby vintage look of it.  Be sure to tie off any trims to the end of the flag at the dowel for extra oomph!
I hope this project has inspired you to look through your stash of fabric and create a flag for your summer and beyond.   If you would like to watch a tutorial for the Vintage Inspired DIY Flags, you can go to KUTV Fresh Living and see us make the Boho version on air.  It will be so fun!
 
If you are wanting to purchase a flag already made for you, both versions of the flag will be up in My Shop for pre-order this week.  Ship dates the first week of June.  There will be limited quantity so when they are gone, they will be gone.  Go ahead and get your pre-order in.  
 
As always, keep Celebrating, Dreaming and Creating something magical in your life.  xo
 

Older Post Newer Post